why-python
![]()
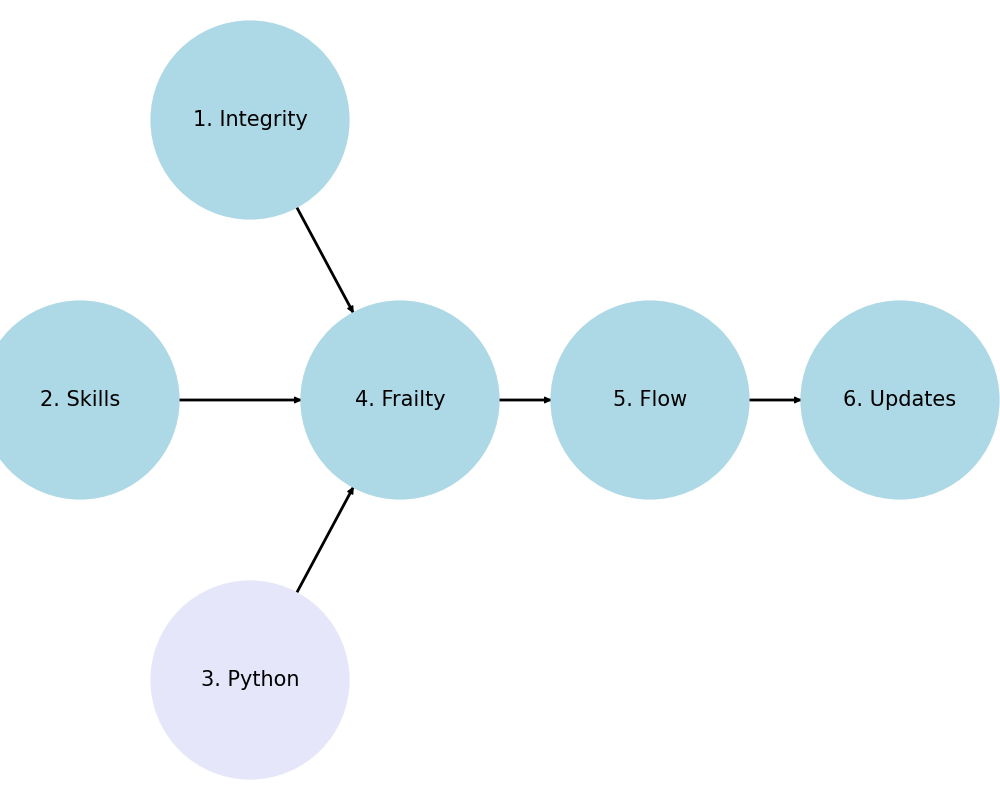
                               1. Numeracy
                                           \
                                  2. GUI -> 4. Web -> 5. Admin -> 6. Software
                                           /
                                           3. Tools
Personal 1, 2, 3
Interpersonal 4
Group 5, 6
Usage
To quickly run Python code that I provide, you can follow these steps:
-
Install Python: Make sure you have Python installed on your machine. You can download it from python.org.
-
Set Up a Virtual Environment: It’s a good practice to create a virtual environment for your projects to manage dependencies.
python -m venv myenv -
Activate the Virtual Environment:
- On Windows:
myenv\Scripts\activate - On macOS and Linux:
source myenv/bin/activate
- On Windows:
-
Install Necessary Packages: Use
pipto install any packages required for the code. I will usually list them if they are needed.pip install package_name -
Run the Python Script: Save the code I provide into a
.pyfile (e.g.,script.py) and run it using the Python interpreter.python script.py
Alternatively, you can use Jupyter Notebook or VSCode for an interactive environment:
Using Jupyter Notebook
- Install Jupyter:
pip install jupyterlab - Launch Jupyter Notebook:
jupyter notebook - Create a New Notebook: In your browser, create a new notebook and copy-paste the code into a cell. Run the cell to execute the code.
Using VSCode
-
Install VSCode: Download and install VSCode.
-
Install Python Extension: Open VSCode and install the Python extension from the Extensions marketplace.
-
Open a New File: Create a new Python file (e.g.,
script.py), paste the code, and save the file. -
Run the Code: You can run the code directly in VSCode by right-clicking the file and selecting “Run Python File in Terminal.”
These methods should provide you with quick and efficient ways to run Python code on your machine.
import networkx as nx
import matplotlib.pyplot as plt

G = nx.DiGraph()
G.add_node("1. Root", pos=(-2500, 700))
G.add_node("2. Pentatonic", pos=(-4200, 0))
G.add_node("3. Diatonic", pos=(-2500, -700))
G.add_node("4. Chromatic", pos=(-1000, 0))
G.add_node("5. Temperament", pos=(1500, 0))
G.add_node("6. Expression", pos=(4000, 0))

G.add_edges_from([("1. Root", "4. Chromatic")])
G.add_edges_from([("2. Pentatonic", "4. Chromatic")])
G.add_edges_from([("3. Diatonic", "4. Chromatic")])
G.add_edges_from([("4. Chromatic", "5. Temperament")])
G.add_edges_from([("5. Temperament", "6. Expression")])

pos = nx.get_node_attributes(G, 'pos')
labels = {"4. Chromatic": "4. Agency",
          "1. Root": "1. Challenges",
          "2. Pentatonic": "2. Skills",
          "3. Diatonic": "3. Tools",
          "5. Temperament": "5. Flow",
          "6. Expression": "6. Growth"}  # Added label for "NDI" node in the labels dictionary

# Update color for the "Scenarios" node
node_colors = ["lightblue","lightblue", "lightblue", "lavender", "lightblue", "lightblue"]
# node_colors = ["lightblue","lavender", "lavender", "lightgreen", "lightpink", "lightpink"]
# Suppress the deprecation warning
import warnings
warnings.filterwarnings("ignore", category=DeprecationWarning)

plt.figure(figsize=(10, 8))
nx.draw(G, pos, with_labels=False, node_size=20000, node_color=node_colors, linewidths=2, edge_color='black', style='solid')
nx.draw_networkx_labels(G, pos, labels, font_size=14) # , font_weight='bold'
nx.draw_networkx_edges(G, pos, edge_color='black', style='solid', width=2)
plt.xlim(-5000, 5000)
plt.ylim(-1000, 1000)
plt.axis("off")
plt.show()